Welcome
Subscribe today for some amazing stories and content from our expedition team or find an outfitter for your next adventure.

Subscribe today for some amazing stories and content from our expedition team or find an outfitter for your next adventure.
Selecting the correct throw bag can be a daunting task and the industry is full of opinions not to mention designs you can use. Throw bags like any other tool a boater uses are not solely for pulling in a swimmer. What you chose and why are critical when things go sideways on the water. In the article below we will be looking at various uses and concerns when selecting as well as deploying throw bags. If you are trying to understand what is out on the market we have a helpful buyer’s guide at the bottom of the page otherwise you can find more info about throw bags below.
These tools have a multitude of uses in a boater’s arsenal which includes an improvised pin kit, helping to ferry a boat across the river, clothes line, hoisting systems, and the list goes on. International Rafting Federation instructor Mark Hirst contributed a fantastic piece on choosing the best throw bag after he headed to India for a workshop. You can check out his article for more info here. For this article we will take a basic look at the typical throw bags people use on the river. We also reached out to Mark Hirst for some thoughts on this topic as well.
Throw bags generally come in two varieties based on how boaters use them: Boat Bags and Waist Bags. These bags have very two very different places in the boating world.
Boat bags tend to be larger throw bags carried in a raft. Since space isn’t an issue here they are typically 75 feet in length and are generally 3/8 inch or 9.5mm in diameter.
The larger diameter rope takes up more space, but tends to be easier to grab with wet hands. This comes at the cost of a much larger bag and more weight.
Boat bags are most often used on commercial rafting trips, on pool and drop rivers, or on rivers where there are known objective hazards that are important to recover swimmers above. These bags are great for wider rivers also, but anywhere you would pull over and set safety from a known point is where these bags typically shine.
A waist mounted throw bag is much smaller and more compact so as to reduce bulk on your back while you are in the water. These bags are more in the 50 foot range and are generally smaller diameter in the ¼ to 5/16 of an inch or 6-8 mm range.
These bags are typically mounted on a belt on the paddler’s waist with a quick release buckle in case they get snagged. Boaters most often wear them in the small of their back, which is a great spot since they often cover the exposed lower spine below the PFD and above the meaty part of your buttocks.
Waist bags are more commonly used in expedition boating, on continuous rivers, on new rivers where you don’t know the objective hazards, or in places where a large bag would be ungainly because safety must be set up rapidly. These bags shine in impromptu rescue scenarios where speed, ease of deployment, or unexpected need arise.
The two bags listed above have two completely different uses and you should consider what kind of boating you do most of the time to understand what bag is right for you. We put together a helpful video below of basic throw bag use.
Knowing how to use a throw bag is good, but more importantly is: Should you use a throw bag? The question you have to ask is: Would deploying a throw bag here put more people in danger or complicate a rescue situation? In swiftwater rescue classes they often pound into your head the following rescue escalation: Reach, Throw, Row, Go, Helo
In Europe we use a similar strategy with 1 more add on
Speech
Reach
Throw
Row
Go
Helo
For many years we were taught that the rescues must run in this order. Many of the modern European instructors are now advocating that the above rescues are simply a tool box of techniques that allow the rescuer to use their own judgment when conducting a rescue.
Options 1-3 are commonly known as your conditional rescues. The condition is that the swimmer is able to help themselves eg swim towards help, hold a reaching object or hold a rope. Conditional rescues if carried our correctly present a low risk approach for the rescuer as they do no enter the water.
Options 4&5 are known as true rescues this is where the rescuer must enter the water either in a boat or ideally on a tethered swim. True rescues have the potential to expose the rescuer to danger as the rescuer is now in the water too. True rescues are used when the casualty is un-able to help themselves.
All of the information above is correct when we are talking about professional rescue crews working on in a river environment. The tactics above do not necessarily work for a group of boaters.- Mark Hirst

One point that is often discussed is the placement of throw in this escalation. Is it better to recover a swimmer into a raft or deploy a throw bag to get them? That is an important question that boaters are faced with on the river when they are deciding to use a throw bag.
These are all critical questions and most boaters who have been running hard whitewater for a while can attest that they have seen their fair share of botched rescues where multiple bags are unsuccessfully deployed or a bag is successfully deployed and the thrower had some bad footing and became a second swimmer. Either way it can become a rope filled mess quickly.
When conducting boat based rescues we use multiple combinations at the same time. When we are rescuing swimmers from a boat the general dialogue is:
“Hey swimmer, swim to the raft” (speech)
“Grab my paddle” (Reach)
“ Lets paddle to the swimmer” (Row)
A common mistake I see often used on the river is the deployment of a throwbag from a raft to retrieve a swimmer. On our side of the pond this is frowned upon for a few reasons.
As both the swimmer & raft are 2 moving objects the accuracy of the throw will be very low. 95% of most people struggle to hit a moving target with a throw rope when they are standing stationary on the bank.
The person who throws the rope is normally the guide which means the moment they stand up to throw they are no longer controlling the boat.
When throwing a rope from a raft to a swimmer you have now introduced 15-20m of rope into a dynamic situation therefore creating a massive entrapment hazard plus you are also going to now have all of the rope in the bottom of your raft loose once you have pulled the swimmer back in.
In one recent video example, by simply communicating to the swimmer that the first thing they should do is to swim back to the raft if they fall out would have saved a lot of hassle. Once the swimmer had fallen out of the raft, the crew stopped paddling. The swimmer could have been rescued much quicker if the guide had instructed the crew to paddle. - Mark Hirst
Having good rescue plan takes some practical experience as well as good situational awareness. The following skills are going to be essential in a throw bag deployment:
Where you stand
How the bag deploys
How to toss the bag
Where to toss the bag
How the rope acts in the water
What happens when you have a fish on the line
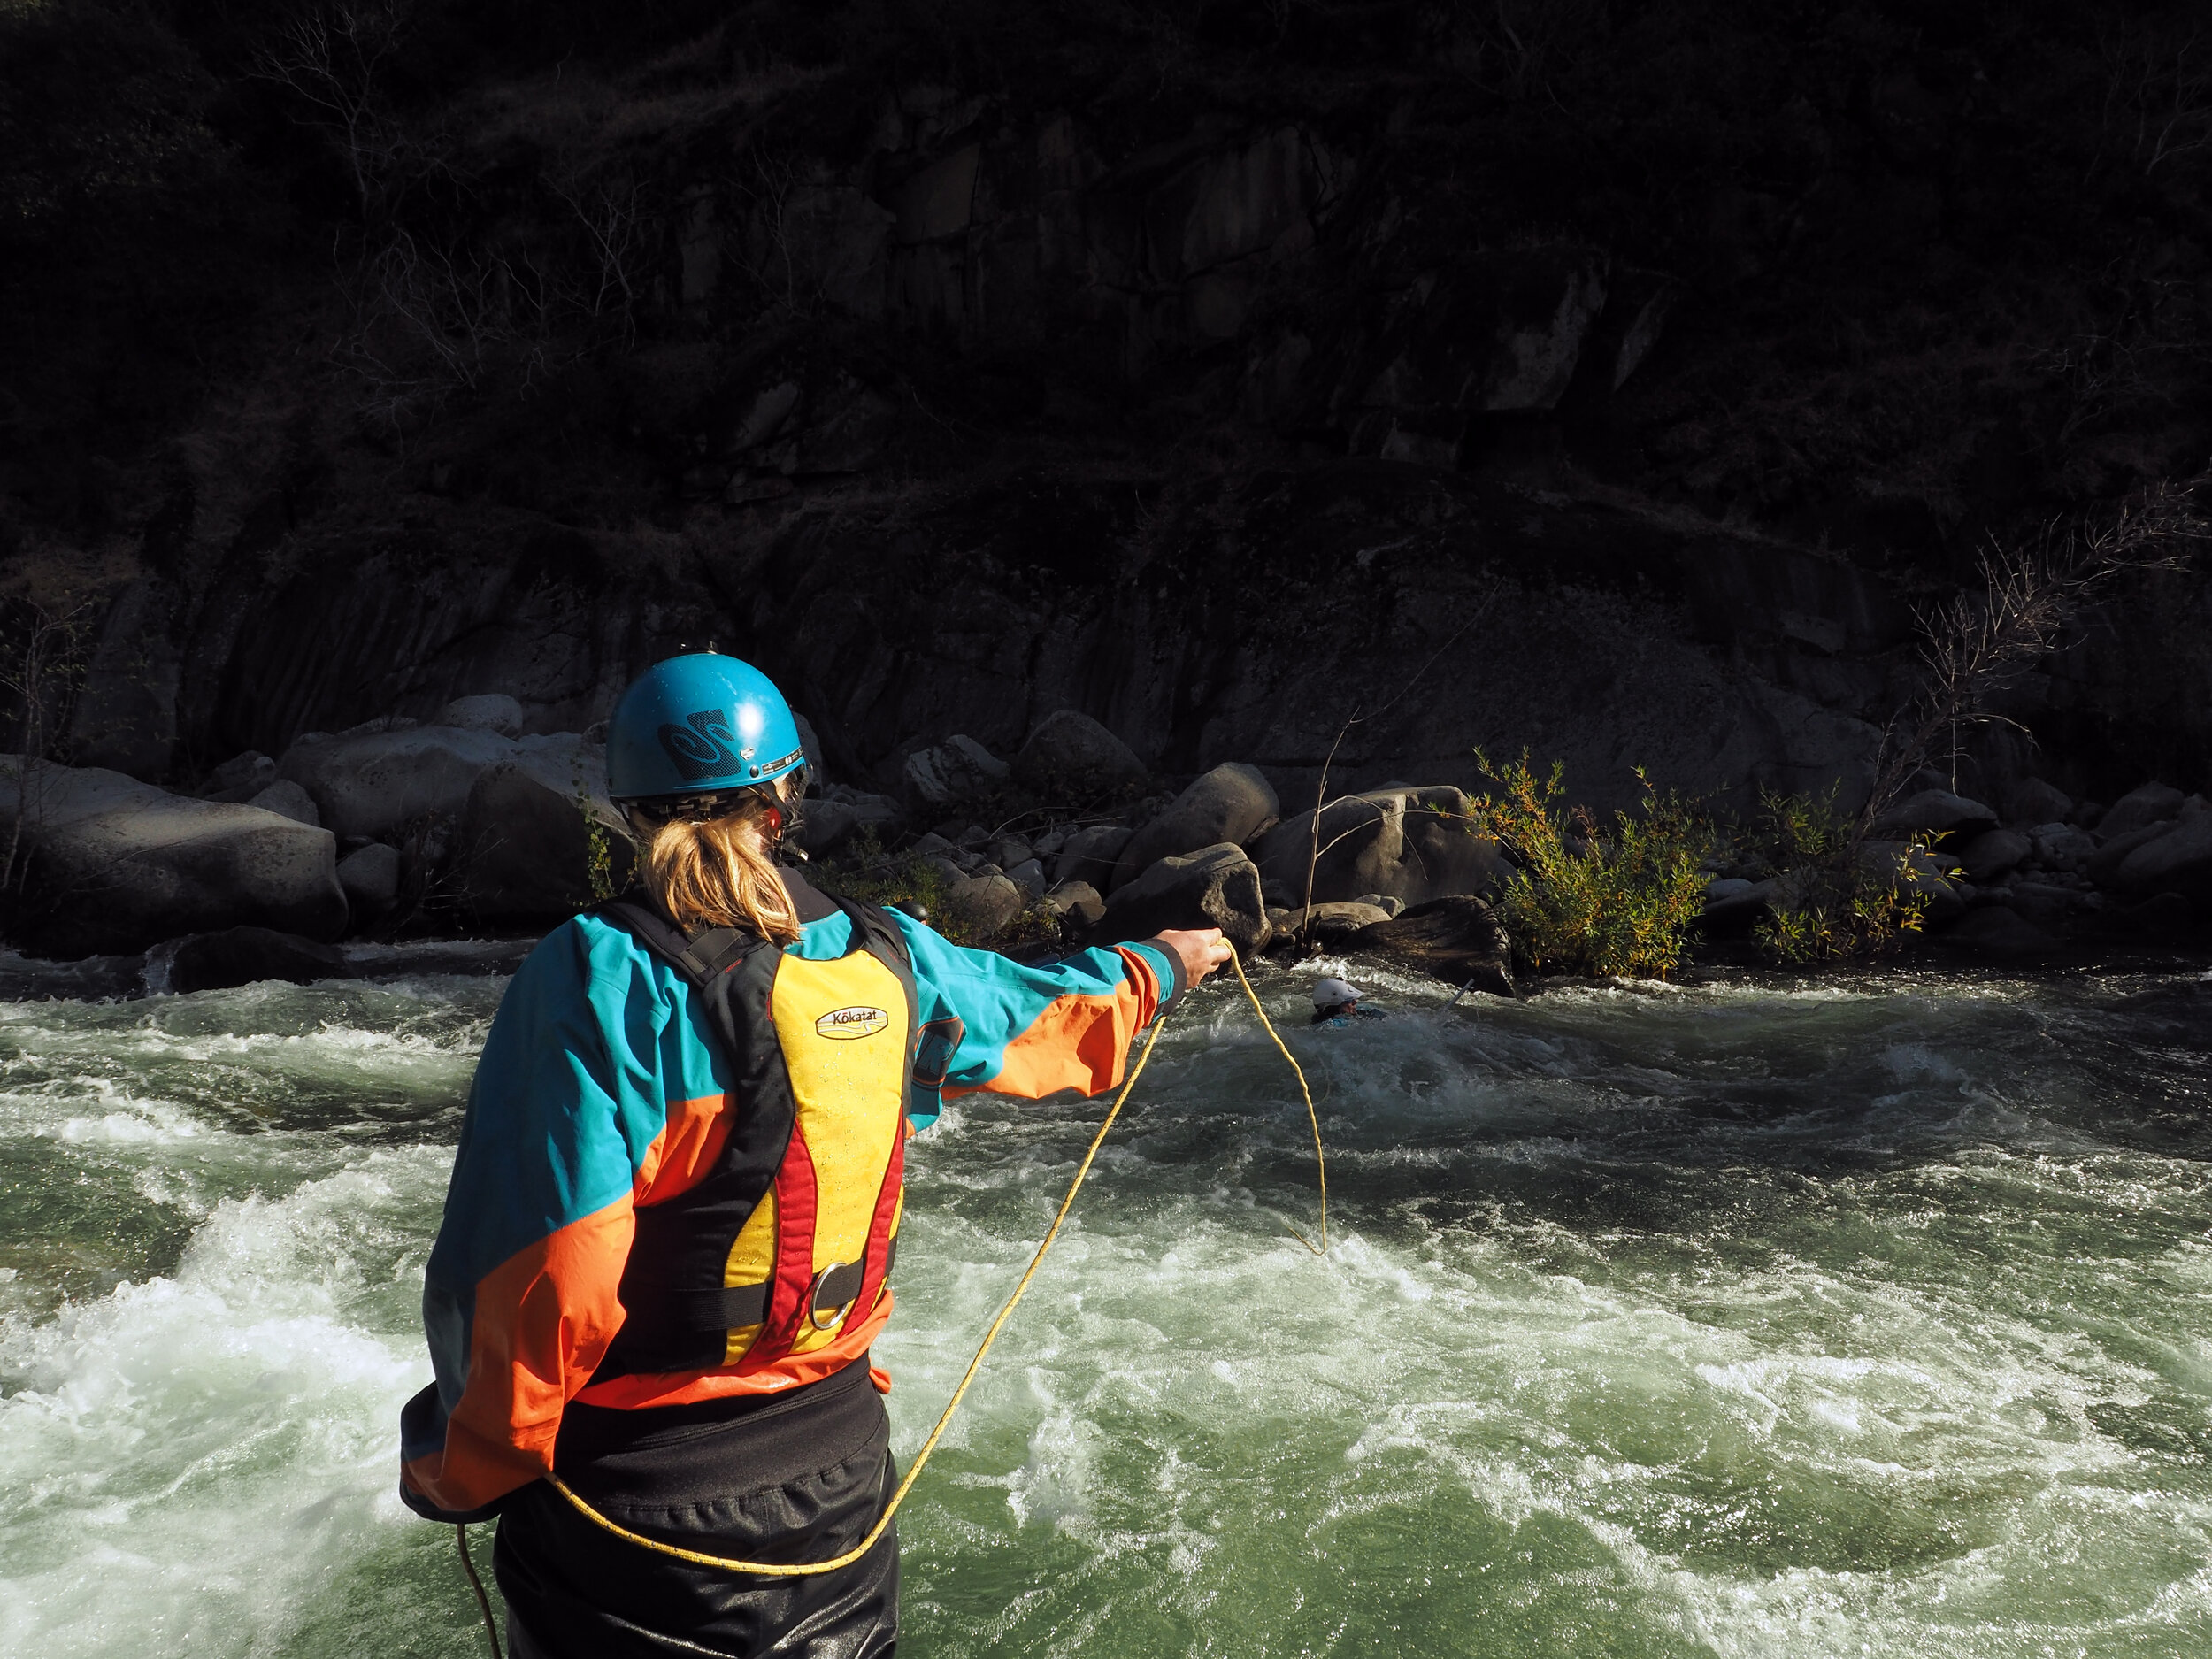
Where you stand is just as important as what bag you use. Having a good footing is critical because if you cannot effectively brace for the swimmer and get pulled off your feet, you become another potential swimmer.
It is important that you can find a place to properly brace on. Another critical skill here is evaluating how risky the terrain is to brace against. Having a second person back you up here can be a huge benefit and can help keep you out of the water if things go wrong.
Falling in the water yourself takes a single swimmer situation and escalates it to a two swimmer situation with a rope in the water. Learning how to avoid these scenarios as well as learning to plan for the rescue are two skills you need to develop before you even pick up a throw bag.

Understanding your throw bag takes training and experience. Not all bags handle the same and not all throws will be good in the heat of the moment. You have to know how the bag deploys both from where it is stored (boat or waist) and how it moves through the air.
There are several options and theories when it comes to deploying the bag: Underhand, overhand, side toss.
Underhand throws are the go to generally. It is easy to control the bag, you can generally get under branches/overhangs, and it protects your shoulder when you toss.
Overhand is a tricky toss, but it works well when there are intervening low obstacles. Some folks find that the overhand throw is more accurate and easier to direct at your target.
The side toss can help if you are in an impromptu situation and there are branches or other tall vertical obstacles you must get around the side of from your braced position.
Whatever way you deploy your bag it is incredibly important that you train with a qualified instructor who can help you accurately and effectively get your bag on target.
This one might seem a bit obvious at first; clearly you want to get the bag to the swimmer. Ideally you want that bag within a foot of their head so they can easily grab it. You also need to be aware of the width of the river vs your rope length.
If you have a very wide big water river and a large wave train in the middle it is possible you may not be able to reach your target at all with the bag.
What if you miss the throw though? How is that bag going to act in the water?
Knowing what the line does once it is deployed takes a lot of training and patience to master. Your line will act much differently when dry as opposed to wet. Similarly what happens if you need to quickly do a second throw? How will a coil throw act differently from a stuffed bag? These are important questions that a qualified instructor along with dedicated training can help answer for you.
Great you did everything right and now you have a fish on the line…now what? This is the point a which planning and forethought are crucial. Most often the line will rapidly come under tension shock loading the line briefly.
If you do not have a good footing this is where you fill find out for sure. The amount of tension and speed at which that tension is applied to the line often catches people unaware. At this point the swimmer will begin to pendulum into the shore.
The question now is do you plan for that pendulum move and plan a place for that swimmer to go to be recovered? Most often there is an eddy at the bottom of a rapid and the most critical goal is to get the swimmer across that eddy fence and to safety.
This is where things can get tricky though. If the river has no eddy because it is highly continuous is there a safe place for the swimmer to end up? Having a second person assisting with the rescue is extremely helpful in getting the swimmer out of the water at this point.

Repacking a throw bag takes a little bit of skill and a lot of patience to do properly. You need to make sure there are no knots and that the line will flow smoothly out of the bag. If there are knots or the line does not flow easily out of the bag it will not travel predictably in flight. here are some tips for repacking your bag:
Hold the bag low at your waist, use one hand to hold the bag and the other to pack.
Throw the line over your shoulder or clip a carabiner to the lapel of your PFD and feed the line through that.
Don’t fold, coil, or force the line into the bag, stuff in a consistent fashion.
Don’t leave a tail out of your bag, some folks advocate that it is for faster deployment. This violates the clean principal and can cause snags and deploy your bag while it is still on your waist.
Understand the risks of using a throw bag as well as the consequences of failing to use a throw bag properly.
If you are working in teams on a rescue be sure to communicate effectively with your team to avoid throwing too many lines in the water.
Avoid deploying your bag from a boat, this can add serious complications to your rescue.
Be ready to yell “Rope!” at the swimmer or have a whistle handy to get the swimmer’s attention.
Never let go or lose control of your line.
Develop good situational awareness and learn wen to and when not to use a throw bag.
Avoid attaching a carabiner to the loop end on the bag whenever possible. If you hit someone in the face with the bag there is a high chance of facial injury which will escalate the rescue situation.
Finally, seek qualified instruction to help you understand how to use a throw bag correctly.
In conclusion I would say that in a recreational or commercial boating environment where the boat & crew are already on the water a combination of instructing the swimmer to swim back to the raft and paddling towards the swimmer to pick them up will be give you a much more effective rescue with lower risks than attempting to throw a bag from a raft. - Mark Hirst
*Disclaimer: Nothing contained here in should be construed as qualified instruction. This is purely an opinion piece/op-ed and as such are not designed as a substitute for hands on training with a qualified instructor or swiftwater rescue professional. For more info see our terms of service.*

MSRP $ 99.95
In your boat or scouting a rapid, the NRS Pro Guardian Waist Throw Bag gives you 55 feet of high-strength rope that's always there when you need it.
High-strength 1/4" UltraLine Water Rescue Rope is suitable for unpinning kayaks as well as rescuing swimmers.
The outer bag has a wide hook-and-loop flap and a zipper to facilitate removing the inner bag. Drainage holes in the bag expel water quickly.
Removable Wedge Throw Bag has foam flotation to keep it on top of the water, mesh sides for drainage and drying, and reflective taping for increased visibility.
A quick-release buckle on the adjustable waist belt ensures safe exit in an emergency.
The internal throw bag comes completely free from the waist belt.
Webbing loops along the belt allow you to attach carabiners.
1/4" UltraLine rope has a maximum tensile strength of 2,495 pounds.
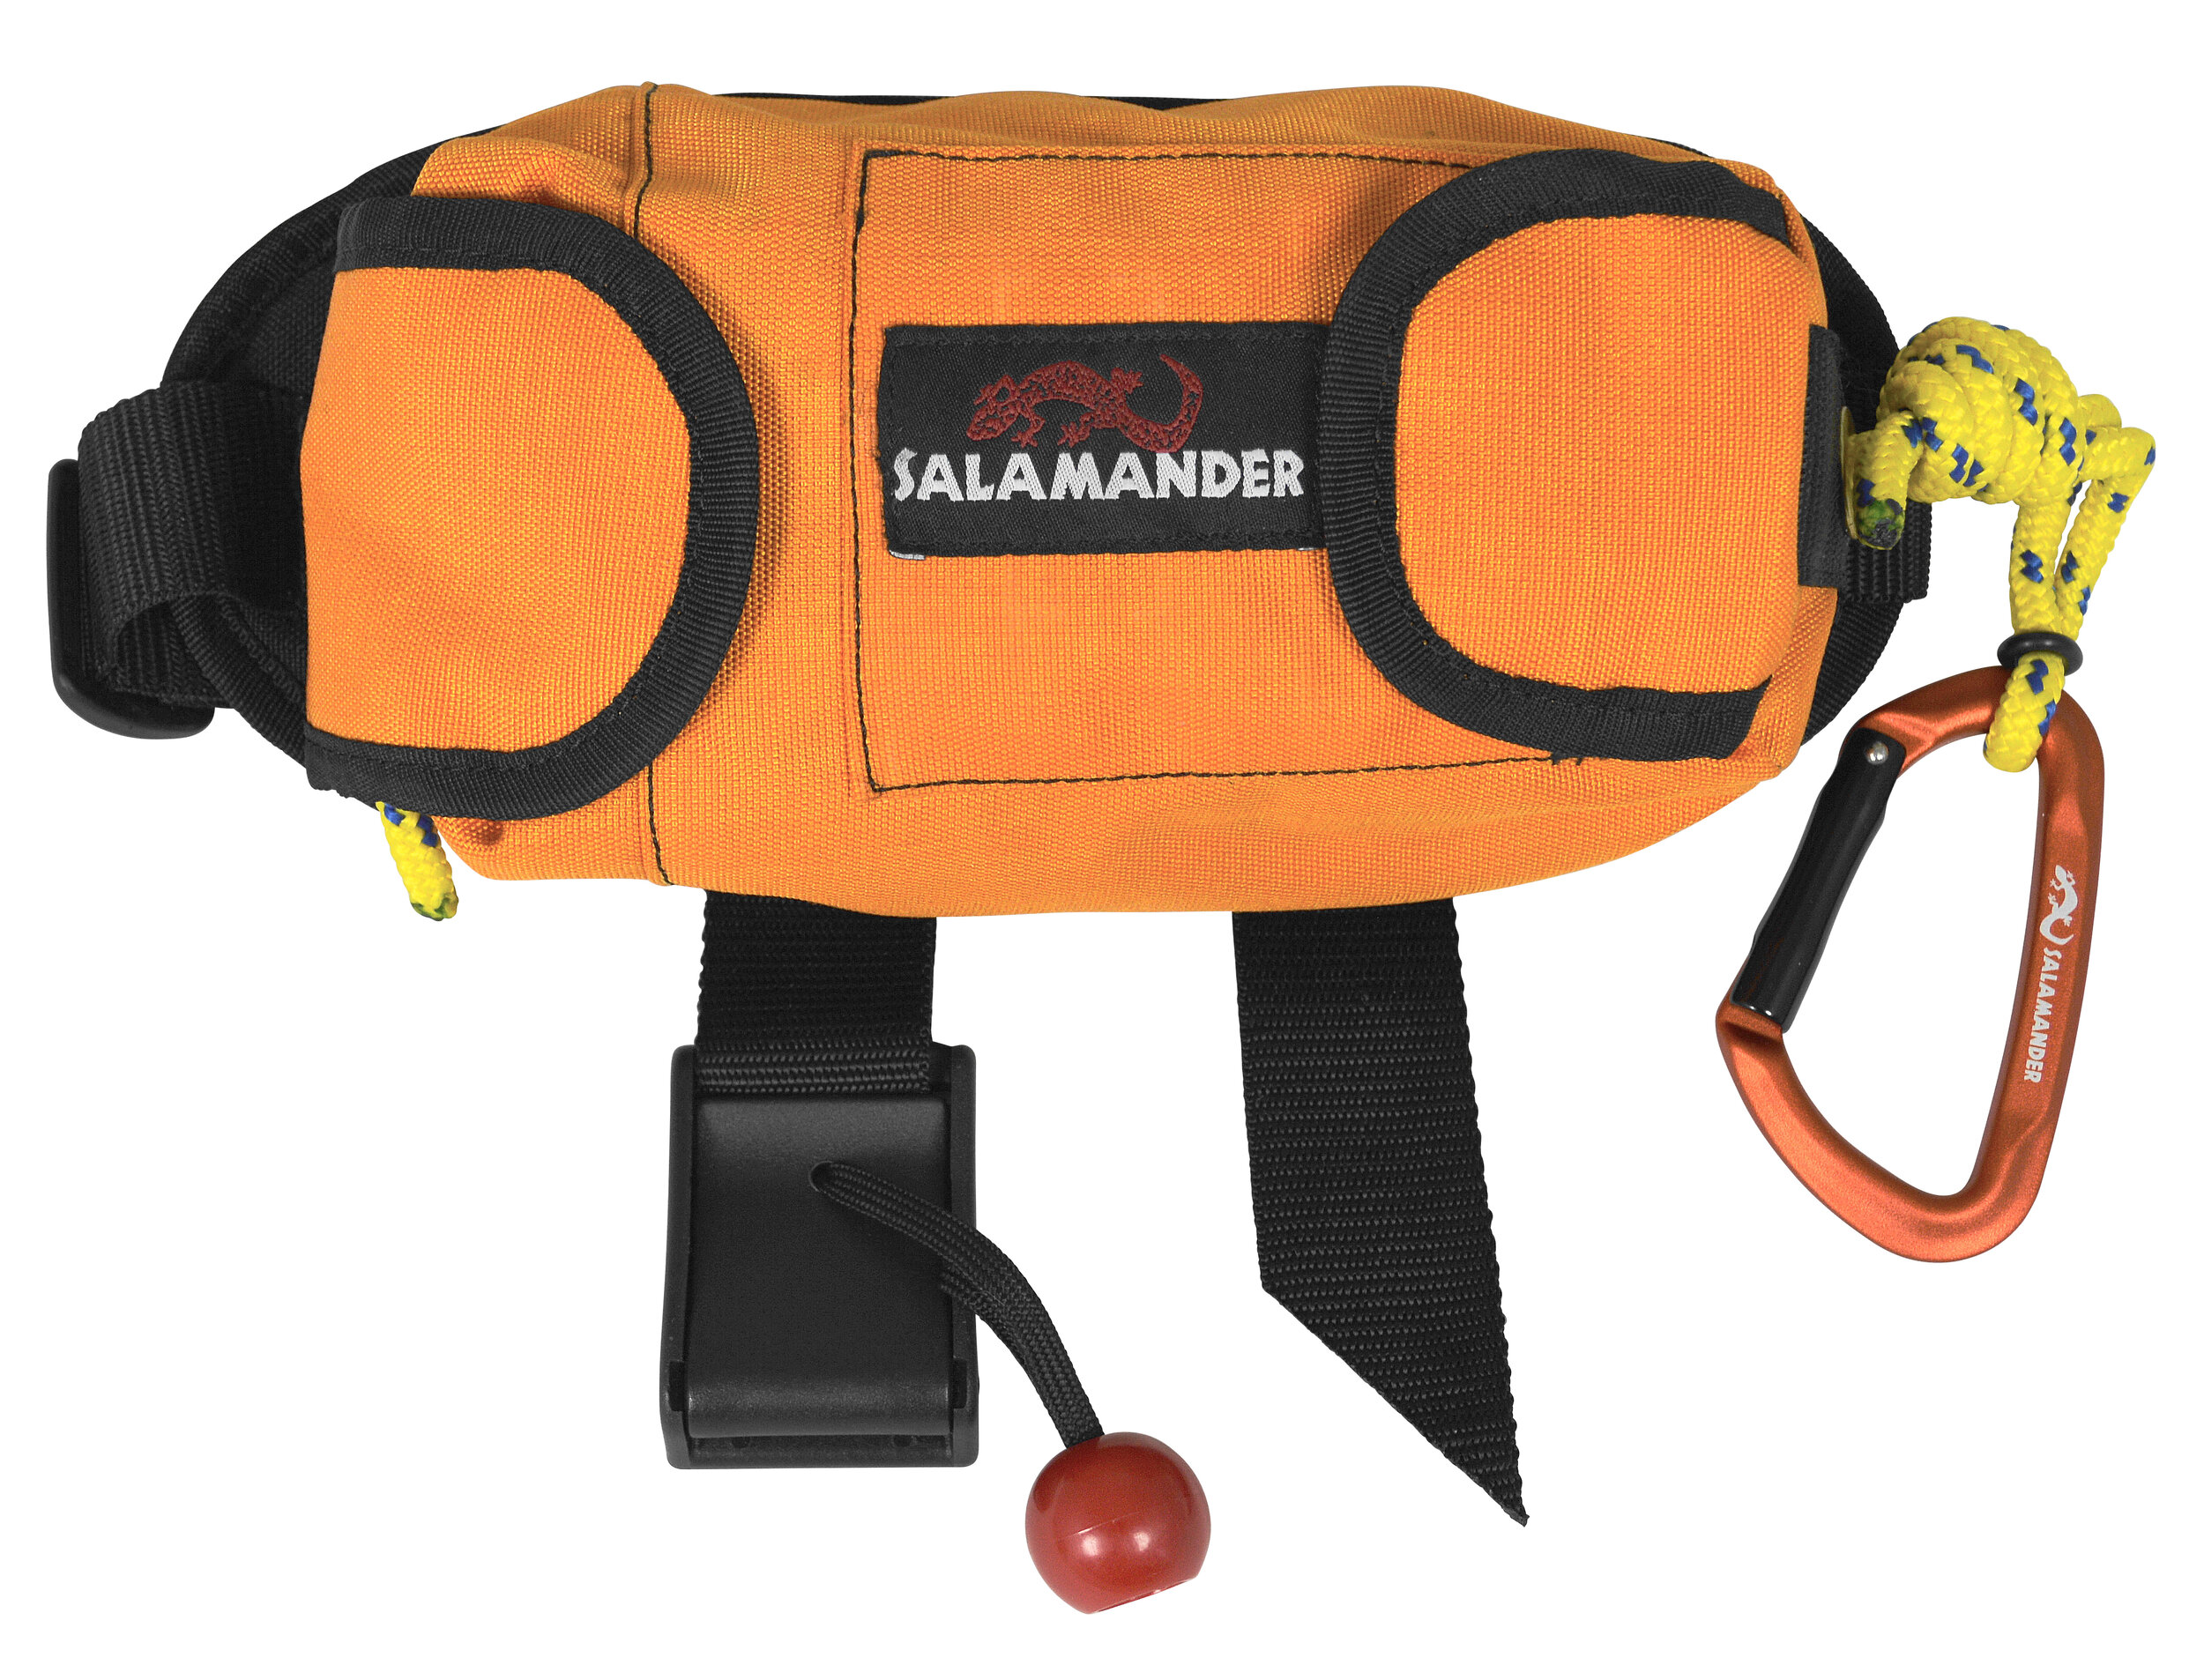
MSRP $ 70.10
The Guide Bag was developed and designed by professional guides. A waist worn bag with 70' of rope meets the requirements for professional operations and insurance.
Throw bag sewn to padded waist band
1.5" Webbing belt with quick release buckle
Anodized aluminum Key Lock carabiner (conceals in pocket)
500 Denier Cordura bag
Adjustable slider on waist belt, 51" max
ROPE OPTIONS
70', 5/16" 1000 lb MFP Polypropylene core, yellow with blue tracer (Stuffed bag weight - 1lb 7.4oz)
70', 5/16" 2500 lb Spectra core, yellow with red tracer (Stuffed bag weight - 1lb. 10.7oz)

MSRP $ 80.95
The NRS NFPA Rope Rescue Throw Bag is the ideal choice for the rescue professional or any boater looking for a bag with extra-strong rope that's easy to grasp and hold onto.
Length 75ft
Rugged Cordura® bag is highly visible for easy location on the water.
The 3/8" Sterling Grabline rope is NFPA 1983,2012 certified. It has a tensile strength of 3,282 lbs. and the sheath has a raised pattern for excellent gripability.
Wide mesh panel in the bag facilitates drainage and reduced dry time.
Two reflective bands and an elastic "holster" for a glow stick, or "chem light", enhance visibility in low-light rescues.
A barrel-lock drawstring is incorporated in a flared nylon top for smoother throws, plus easy reloading and closure.
1" webbing with side-release buckle secures the top rope loop and lets you attach the bag to D-rings, boat frames, etc.
Internal foam flotation keeps the bag on the top of the water where you need it for rescue.
Polyethylene-sheathed grab loop makes it super quick and easy to hook on a carabiner
MSRP $ 149.95
Still made with our reliable UV resistant nylon and webbing, with a mesh bottom for easy draining and a foam insert for proper floatation, but we've added some upgrades! First, we installed a second grommet to the bottom of the bag allowing you to run your weight bearing knot so just the loop is exposed from the bag, and the rest of the knot is contained within the bag (See Photo). This system provides an easy attachment point for carabiners and mitigates the risk of entrapment by minimizing the amount of exposed rope.
Length 75ft
Material 420 Denier Nylon Fabric with Urethane Coating; PhiferTex Mesh
Size 10in x 7in
Rope 9.5mm Dyneema Sure-Grip
Tensile Strenth 4,429lbf

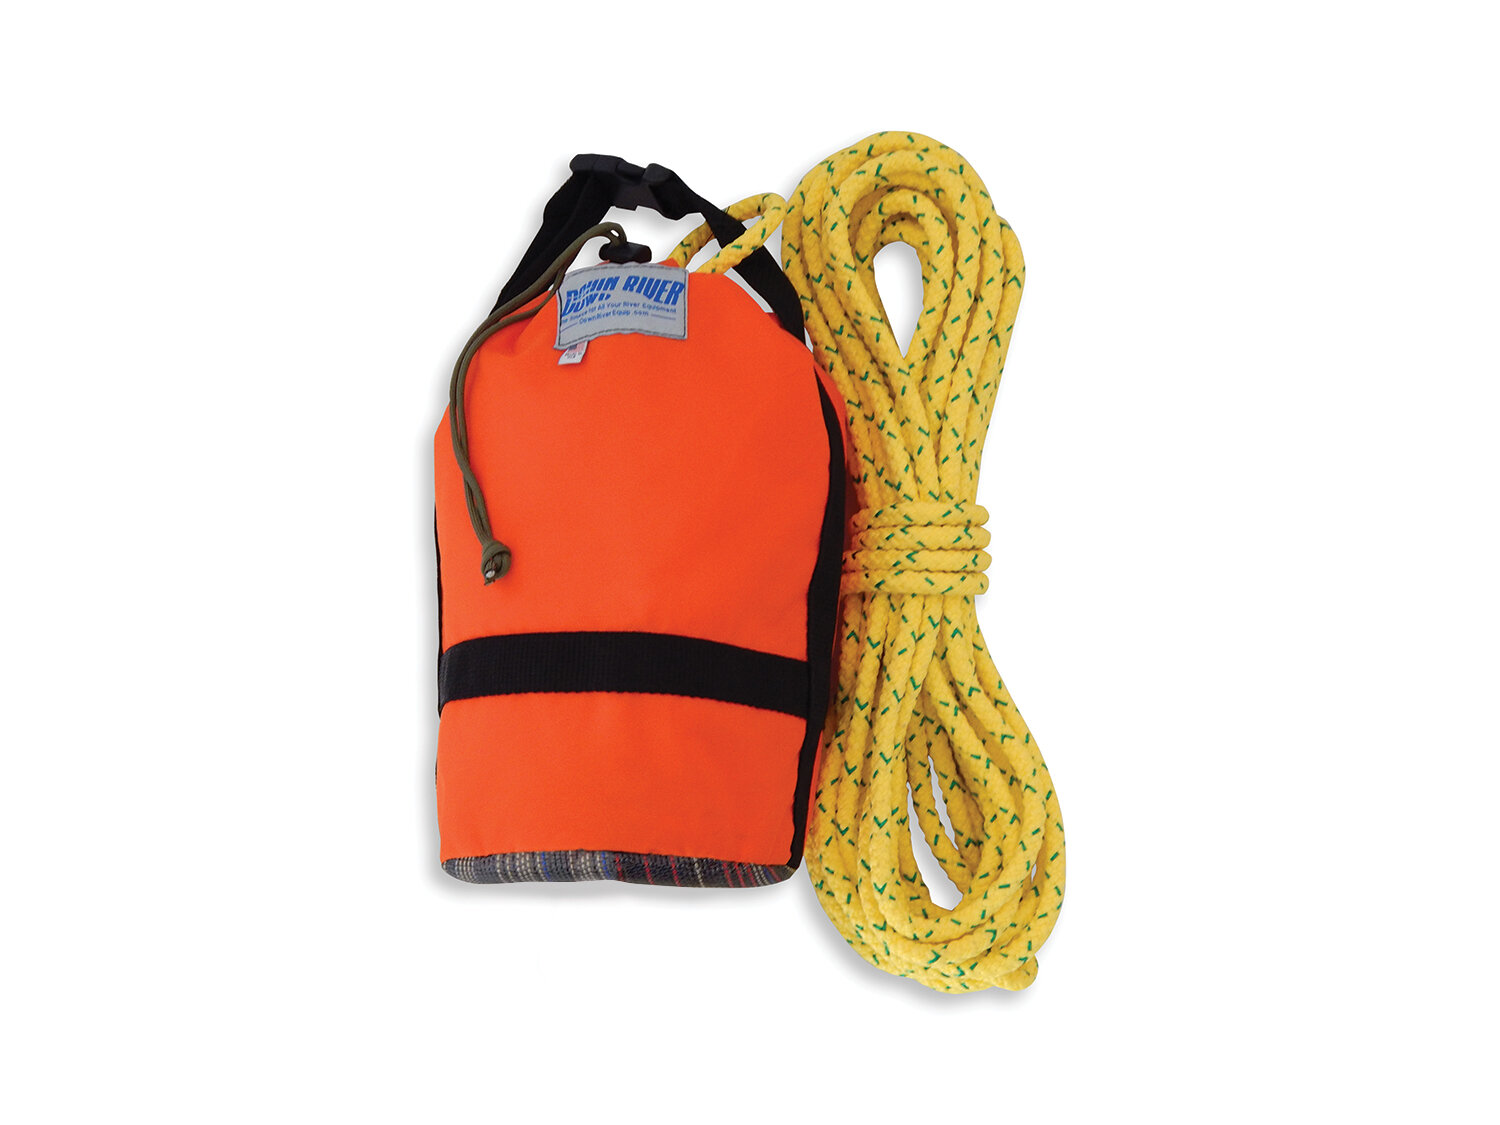
MSRP $ 92.95
Every raft needs one and every rafter needs to know how to use it: Rescue Rope is a throwable bag with a length of rope inside that can be thrown accurately in an emergency. Rope is anchored in the bottom of the bag and is stuffed loosely so that it pays out through the top when thrown. A loop of rope protruding from the bottom of the bag provides a hand-hold for a victim or a place to secure the rope to a raft or tree.
Length 75ft
An attached nylon strap has a quick-release buckle so it can be snapped to a rowing frame or D-ring.
Floating yellow 5/16″ Blue Water Rescue Rope
3,000-lb. breaking strength.
